Yes I’m alive! + swatch & review of Polished by KPT thermals~

*Purchased By Me

Hey dears! Apologies for the long absence, university does that to you! I see we have new followers, and I’m so happy about that! Welcome everyone! ^^ ❤ For those who don’t know, I’m the other half of this blog- running it with Bethanie :3 Luckily she has been updating the blog daily cause she’s currently on holiday (although she’s starting her internship already!).

Okay enough chit-chat, I’m just popping in for this quick swatch and review of 2 of my beautiful thermals from Polished by KPT. Apologies in advance for the photos, I didn’t take these using my digital camera, but with my iphone 4. ><

Today I have Blue is Beautiful and Molybdenum for you.

IMG_6045

First, Blue Is Beautiful. Photos show 3 thin coats by itself, top coated with Sally Hansen Mega Shine.

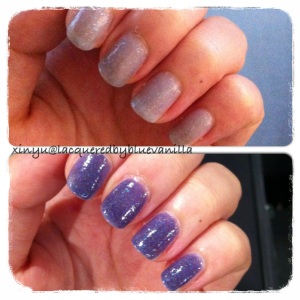
This polish is described as a “Dark blue scattered holo with a fading thermal effect and small blue glitters.” This is simply beautiful.

When in the warm state, which was what it was most of the time on me, it was a cornflower/grey colour. Gorgeous. :3 When cold, it turns blurple. The glitters are apparent in both states, but pops out so much more when cold! I had fun brushing my hands against icy cold drinks…^^

I did have some issue with the formula though, it was jelly-like, a bit thick so it took effort to get a nice application. Once I got the hang of it though, it was smooth-sailing. (:

IMG_6256

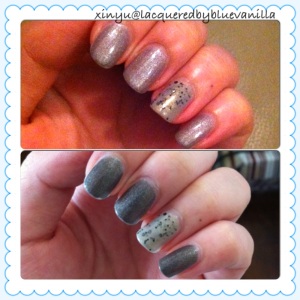
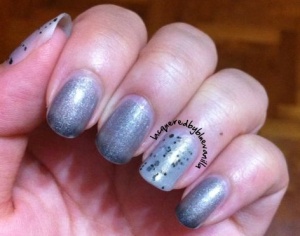
Molybdenum is described as “pewter-like colour changes to a silvery chrome like finished when warm. ” Part of “The Transition Elements Volume I” collection as “in their natural state, the nail polishes mimic the colours of these elements, hence, the reason for their names.” Photos show 2 coats.

Oh my goodness. This polish is PEWTER-FUL.<3 It is like a gunmetal grey colour- I loved it in both states. Application was really easy for this one too, as compared to Blue Is Beautiful. Went on like buttah. Here, I’ve matched it with Happy Hands Nail Polish Afternoon Thunderstorms for my accent nail.

IMG_6260

Managed to capture the transitioning effect!

ShabbyBlogsDividerE

Bottom line- I need moar thermals in my life! My friends were fascinated by my nails and would constantly hold up my hands to observe the colour change! Definitely a good conversational starter ^^

I purchased my polishes during a pre-order which Shoppe Eclecticco awhile back. Polished by KPT can be bought directly from their store(US only), or various other international retailers! (:

*P.S: the labels of the nail polish bottles are NOT waterproof- I found out the hard way and lost the pretty labels.. T~T

signatureblogwithheart

Indie polish love~

*Purchased By Me

Hey loves, been so busy that blogging has seriously taken a back seat for now! Also, there’s some personal changes which I have been thinking about and slowly taking steps to change in my life, so sorry about the small breaks in hearing from me! I’ve also neglected our polish jewellery shop but thankfully I have Bethanie to back me up!

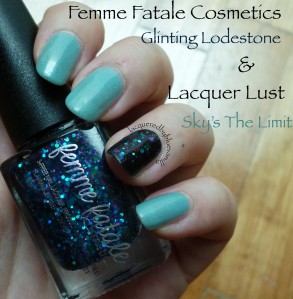
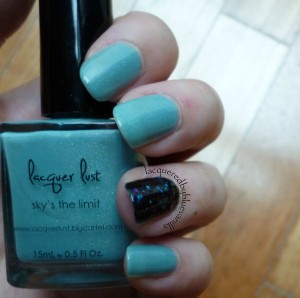
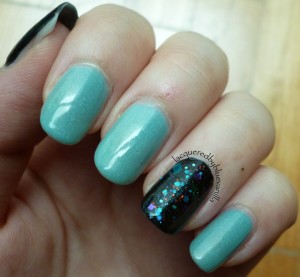
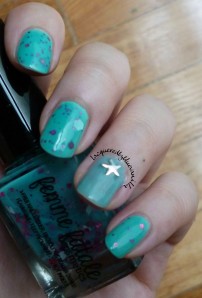
Okay anyways~ Here’s a manicure which I wore sometime back in August! I really really love all the indie polishes..if only I had more money to purchase them heh! This features Femme Fatale Cosmetics Glinting Lodestone and Lacquer Lust Sky’s The Limit.

P1000399

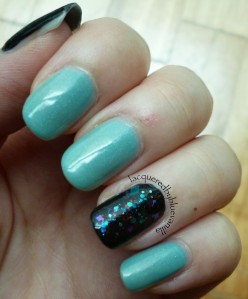
I think I used 2-3 thin coats of Sky’s The Limit and one lovely coat of Glinting Lodestone over Revlon Black Lingerie. It’s so pretty…:3 and I feel both polishes really go well together! ^^ No problems with any application, and I simply love the bottles. ❤

P1000403 copy

Glinting Lodestone is described as “a dark navy jelly full of teal, blue, green, purple and highlighted by flashes of orange. ” When I heard it was going to be discontinued, I immediately snapped mine up at Beauty So Fly with a couple other beauties. Have I ever mentioned that I want to “BUY ALL THE FEMME FATALE COSMETICS” ? :3

Sky’s The Limit is described as “a baby blue linear holo.” Been wanting this shade for ages, and managed to get mine from Shoppe Eclecticco during an offer!

P1000402 copy

P1000404

Hopefully university will settle down soon(haha I’m kidding myself) but I’m having a really great time with all the people there! (: With luck I should be able to tend to the shop soon!

signatureblogwithheart

Follow the Yellow Brick Road~

*Purchased By Me

Hey dears! TGIF! I just realised I kind of spammed you guys with posts in a row, but hey- I can’t be so mean to leave you all hanging and not show you the last colour I received from my Bondi August Subscription Box!

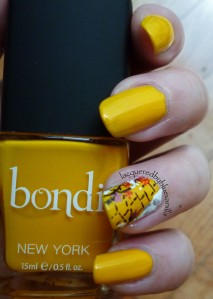
P1000427 copy

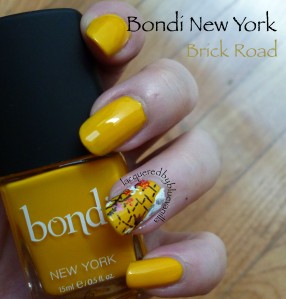
Brick Road is described as “Dorothy would’ve gotten home a lot quicker with this hot hue painted on her hitching thumb. A bright and sunny shade perfect for a yellow brick road trip with friends or a night out with The Wiz. Now just ask yourself – are you a good witch? Or a bad witch?”

This colour was the one which I was unsure of when I first opened my box. How would it look like on my skin? Would I actually wear it? I’m not a fan of yellow polishes(though I really love the look of Lickitung from Sayuri’s Gotta Catch Them All Collection) as I feel Asian skin and yellows don’t match. After swatching it though… it surprisingly looked good on me, although I think I would still use it for nail art/draw nail art over it!

P1000430

Of course, Brick Road had to go with the yellow brick road from The Wizard Of Oz. The whole time I was swatching, I had the song stuck in my head. Now it can be stuck in yours too! Hehe.

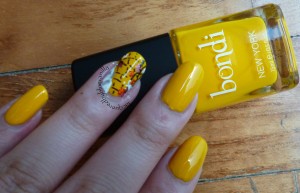
P1000428 copy

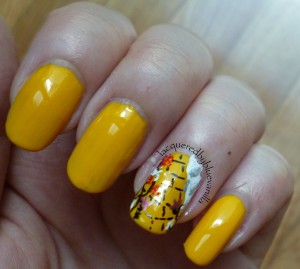
This gorgeous yellow, a tad brighter IRL compared to photos was 2 lovely coats. Formula was good, application fuss-free as all the other polishes.

I attempted to draw a brick road(with flowers, and the white/silver area is supposed to be mountains) on my accent nail.

P1000433 copy

I never expected to fall in love with a yellow, but I think Brick Road has captured my heart, along with the other shades. ❤

Nail art for NYPD and Fuschia-istic is coming up!

signatureblogwithheart

Bondi New York: NYPD & Fuschia-istic

*Purchased By Me

Hello dears! Today I will do a swatch and review of the colours in my Bondi August subscription box.

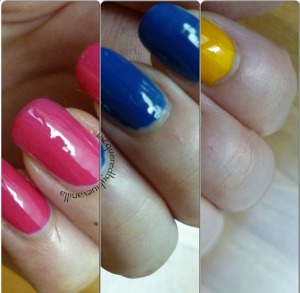
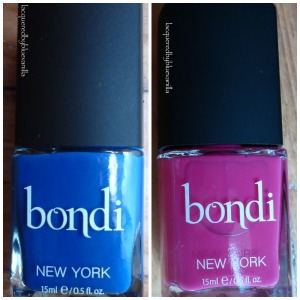
bondinailscollage (L>R: Fuschia-istic, NYPD & Brick Road)

Today I will show you swatches of NYPD and Fuschia-istic. I accidentally did nail art using Brick Road before I had taken swatch photos, so that will be shown another day.

nypdfuschiacollage

P1000416 copy

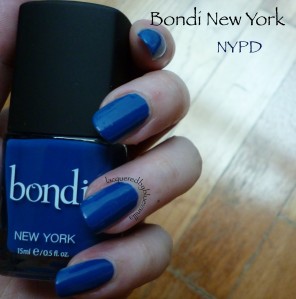
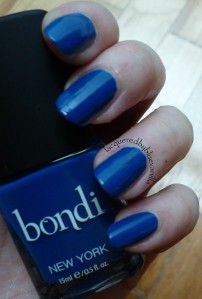
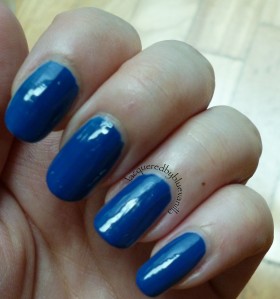
NYPD is described as “You have the right to remain fabulous. You have the right to rock a killer blue nail polish. Anything you touch will be used against you by one of New York’s finest. Aim for the handcuffs.”

NYPD stands for the New York City Police Department. This gorgeous medium navy blue definitely captures the blue seen on the side of police cars. (I googled photos!)

P1000417 copy

This baby could almost be a one-coater, but I used 2 coats to even out any patchiness. Formula is good although application was not as smooth as Fuschia-istic. No problems of bubbling or streaking.

P1000419 copy sans top coat

I love this shade of blue- I rarely wear darker shades(black aside), so this shows how much I love NYPD! ^^

P1000435 copy

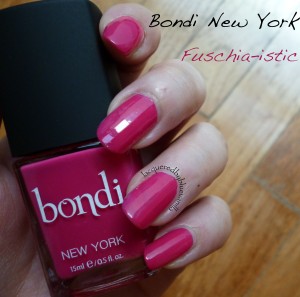
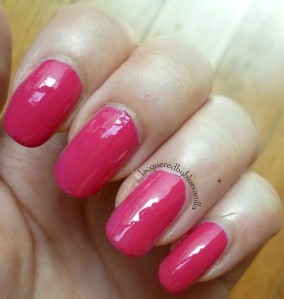
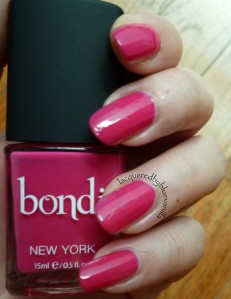
Fuschia-istic is described as “Your future’s so bright that you gotta wear this shade. Fuschia is all the rage amongst the sexiest of cyborgs – so stay two steps ahead of the style trend. No Delorean required.”

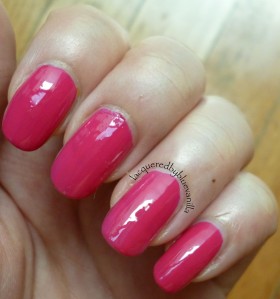
love this shade so much! This was honestly the first polish I turned to, to have a cute pedi. :3 It’s gorgeously bright- not retina-searing but still loud enough to garner attention in a good way.

P1000438 copy

Can I also mention that the application was as smooth as buttah?

Also, I don’t know why the photos appear as if the polish is uneven- IRL it was gorgeously smooth and shiny. I did not use top coat for all the photos. The polish also leans a darker shade of reddish-pink IRL.

P1000436 copyP1000437 copy


I also love the square bottles Bondi has. It has a rubberized cap, and apparently it can be taken off,(read it on a fellow nail blog) like Illamasqua ones, but I’m not sure about that. I worked with the bottle just as it is, and it was not difficult to hold or apply. In fact, I felt that the square shape gave me a better grip hehe. ^^

The packaging of the bottle is elegant, complementing Bondi and their logo; and it fits nicely in my polish storage area.

Stay tuned for swatches of Brick Road and nail art I did with these two shades!

signatureblogwithheart

Happy Hands Nail Polish- Afternoon Thunderstorms

*Purchased By Me

Hey dears, TGIF! My week has been super busy with all the projects, so I’ve not been consistent in commenting on fellow bloggers’ lovely posts on the blogosphere! Anyways quick post today as I need to plan images for my creative photography class, as well as cross my fingers and hope that I’ll be able to borrow a DSLR! Wish me luck!

Today I have a swatch and review of Happy Hands Nail Polish- Afternoon Thunderstorms for you. This swatch was done awhile back so photos were taken with my iPhone.

IMG_5345

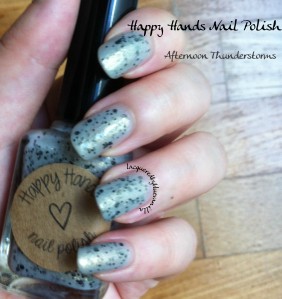
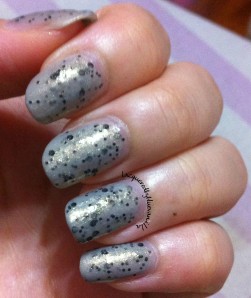
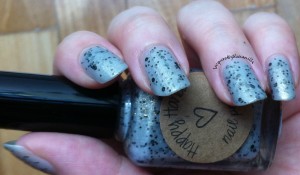
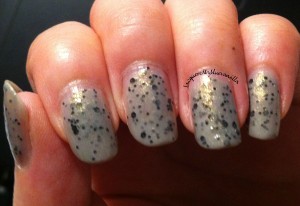
Afternoon Thunderstorms is described as “a stormy gray jelly with small & medium black hexes and a strong red-gold shimmer, reminiscent of lightning strikes or sunlight peeking through rain clouds.”

The polish is exactly like the description, and I love the label. It’s also a square bottle- I’m loving this shape more and more! ^^

IMG_5341

Look at the beautiful golden shimmer. :3

I initially was hesitant about purchasing Afternoon Thunderstorms as I wasn’t sure how grey polishes and my skin tone would mix. After staring for a long time at swatches by Chalkboard Nails, I went ahead and purchased it as Mei Mei’s Signatures was having a flash sale. I definitely have no regrets about this purchase as it matched perfectly with my skin! 😀
IMG_5344

I used 2-3 thin coats if I recall correctly, and the hex glitters came out perfectly. It does dry with a bit of bumpy texture due to the glitters, but a nice coat of Seche Vite fixed that.

This speckled polish fits in nicely with my Illamasqua ones, and is my to-go shade when I crave some grey.

IMG_5352 at night, with desk lamp lighting.

Happy Hands Nail Polish can be purchased here, and international customers can purchase from Harlow & Co, Mei Mei’s Signatures, Femme Fatale Cosmetics, Edgy Polish and Dazzled(opening soon). You can also keep up to date with products via Happy Hands Nail Polish’s Facebook page.

signatureblogwithheart

Gloss ‘n Sparkle – Goodbye Sober Day

*Purchased By Me

Hello lovelies! As I was looking through my computer folders and editing photos, I came across this manicure which was left sitting on its own! I posted this manicure sometime back on Instagram, but I haven’t blogged about it yet! This was during my nail break on my cinderella hand and when I decided to trim all my nails!

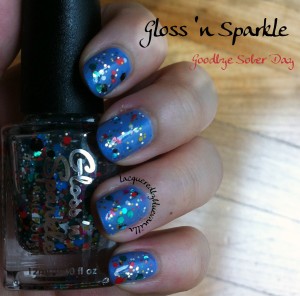
Today I have swatches and review of Gloss ‘n Sparkle Goodbye Sober Day.

IMG_5473

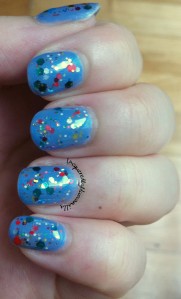
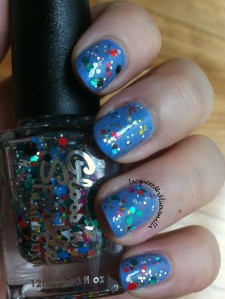
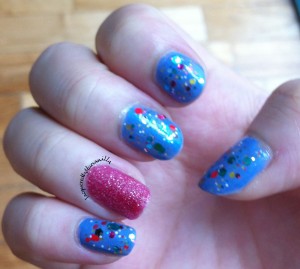
Goodbye Sober Day is “a crazy mix of vibrant matte and metallic colors in a clear base, yellow, pink, orange, blue, green, turquoise and fuchsia, black and white, with heaps of hexes, sprinklings of dot shaped glitters, including large black circles, and white diamonds.” It looks fantastic over a variety of colors; here I’ve swatched it over H&M Peppermint Fusion.

IMG_5479

This polish has the case of the brush picking up so many glitters at the same time! I did try to strategically push the glitters around so the smaller ones(or similar colours) would not stick together. (: No other issues to report with this polish!

I used 2 coats, the second one to get some larger glitters out onto my nail where I deemed fit! (:

IMG_5475

I love this combination! 😀

IMG_5476

On my right hand I did an accent nail using Zoya Miranda. I think the red glitters in Goodbye Sober Day complement this lovely textured polish! ^^

Goodbye Sober Day can be purchased from Gloss ‘n Sparkle’s etsy store  which ships only within Australia, but international customers can obtain this via Shoppe Eclecticco and Llarowe(:

signatureblogwithheart

Femme Fatale Cosmetics- Winter Hyacinth

*Purchased By Me

Hey dears! Today I have a swatch/NOTD with Femme Fatale Cosmetics Winter Hyacinth!(: I wore this manicure a week back, and I loved it so much! ^^

P1000350

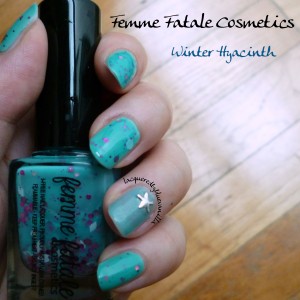
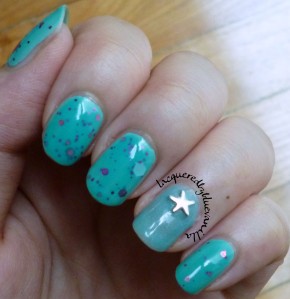
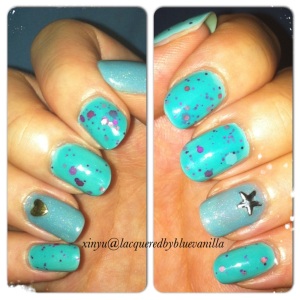
Here I have it paired with Lacquer Lust Sky’s The Limit along with studs from the Born Pretty Store.

Winter Hyacinth is described as “a soft teal creme polish with white diamonds and hexes, as well as fuchsia and rose hexes both in metallic and holographic finishes”. I’ve swatched 1(or 2, I can’t remember! :/) over China Glaze For Audrey. (:

P1000351

It applied like a dream and I could not stop staring at it the whole day! I honestly did not know there were white hexes(they looked translucent on the nail) in the bottle, so when I got them out on my nail, I squealed. :3

No dabbing for glitters was needed, though I did suspend my bottle upside down on the table as the white diamonds were at the bottom. I could get them out with ease afterwards. (:

P1000352

Winter Hyacinth was really tricky to photograph! Love me some blue polishes though, they just look right on my skin. (:

I’m so glad I received this polish- it was part of my anniversary gift from the bf hehe! ^^ Of course we sat down together to pick the polishes, and it was a tough time narrowing down the list to just 5 bottles.

IMG_5636 Cinderella hand makes an appearance! (:

Femme Fatale Cosmetics can be purchased from the Femme Fatale Cosmetics site. Please note that they only ship within Australia, but I think it’s being revised soon! Visit here for a list of international stockists (:

signatureblogwithheart

Serum No 5 Day Glow: Swatch & Review

*Purchased By Me

Hey guys! I’m finally back heh! So sorry for not updating but I figured a good time to start the “3-4 posts a week” would be today, which is Monday! ^^ As you guys read this I’m probably attending my first lesson of university life, so wish me luck! (:

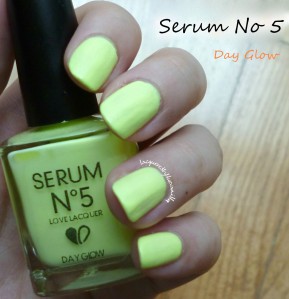
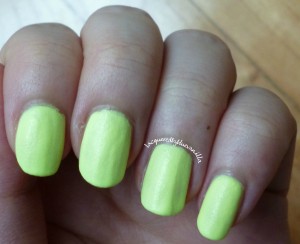
Today I have a swatch and review of Serum No 5 Day Glow for you guys. This polish is the most popular lacquer in the Serum No 5 lineup!

P1000295

Day Glow is described as “A lemony yellow by day, a brilliant glow by night. Please note that due to the nature of the glow pigments that I use, this polish may have a matte finish, but top coat can be applied without affecting the glow.”

Day Glow is the very first polish I own from Serum No 5, and I actually got it as I wanted a lovely glow in the dark polish for polish jewellery making. Yellow polishes and asian skin don’t mix, so I seldom own don’t have any yellow polishes in my stash! This is my first.

P1000299


The colour turned out pretty okay on my skin tone, but I think I’ll stick to using it for nail art!


I did have some application issues as I was not used to the formula of the polish. The polish was rather chalky and did not even out properly. This is my second attempt, and I think the key is to apply thin coats of polish. Thankfully, Day Glow dries really quickly, and to a lovely matte finish, with a bit of grain to it. I used 4 coats for my photos as I accidentally bumped my third layer before it had dried.

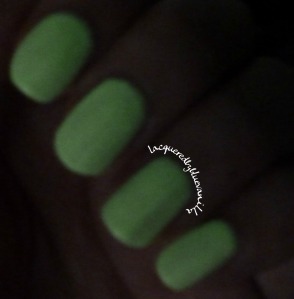
The glow of this polish is really strong, better than Different Dimension’s Light It Up Blue…which I still haven’t properly swatched for you guys. :/ In shade, it glows slightly.

P1000300


This was taken in my cupboard and is my first attempt at a proper glow shot! Of course, in a pitch black room the glow is crazily strong, and I couldn’t capture it with my camera! ): I don’t think I’ll be able to sleep with Day Glow on my nails though as I’m light sensitive!

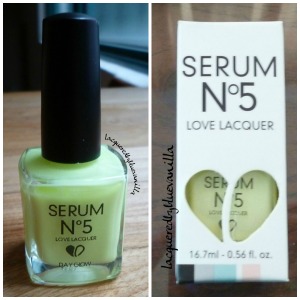
I also looove the packaging.

serumno5dayglowcollage


How cute is the box with the heart cut out? :3

Serum No 5 can be purchased from the Serum No 5 etsy shopand international customers can purchase it from Mei Mei’s Signaturesa Singapore- based nail polish shop. All 20% of Serum No 5 profits go to charity.


signatureblogwithheart

Gloss ‘n Sparkle Lead Paint- swatch and review♥

*Purchased By Me

Hey everyone, today I have my very first Gloss ‘n Sparkle polish to show you guys! I caved during the Aussie Indie Sale at Shoppe Eclecticco (which btw is still ongoing) but I managed to resist and only purchase one…but I’m feeling tempted to go purchase more! Help me. :/ I’d like to make a note that I also ordered(and received) 3 beauties from Mei Mei’s Signatures, which I will only be posting swatches and reviews of sometime in August due to the OMD Challenge in July by Brijit’s Digits, Eeeek! Nail Polish! and Craftynail! Speaking of which I have only half of the days done(not in order), so I need to seriously get down to some nail art.

P.S: I’m so sorry, I love this polish so much so…more photos will be shown of this beauty!

Presenting, Gloss ‘n Sparkle Lead Paint~♥♥

IMG_4953IMG_4982

Firstly, I really struggled trying to get nice photos of Lead Paint. The gorgeousness of this polish was just not showing up on camera…I really need to build a lightbox soon! :/

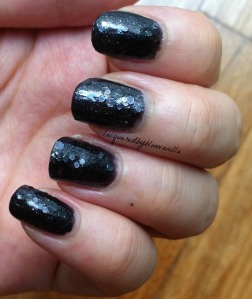
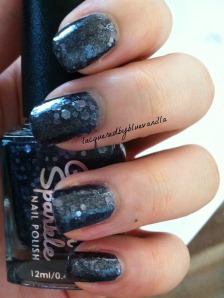
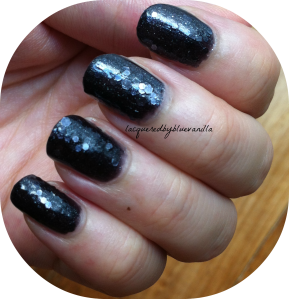
Lead Paint is described as “a dark grey base reminiscent of a lead pencil with fine shimmer and large and small gunmetal grey hex glitter”, and yup, it is really the dark grey-going black shade on me. This polish is a lovely twist on the standard black nail.

IMG_4961 See those hexes? Love.

I did have a bit of application issue initially with this polish, as the hex glitters would be dragged along with the brush and end up sticking over my nail. Once I got the hang of it though, everything went smoothly.

IMG_4960

I used two coats, around the thin-medium range, and got great coverage. I don’t think I would recommend having thick coats for this one, it is probably much easier to handle with more thin layers!

IMG_4954IMG_4968

I love the fine shimmer running throughout this polish. Lead paint has never looked so…appetizing. Yum. :3

The brush of this polish was also easy to handle and it picked up the hex glitters very easily. No fishing around for any glitters!

IMG_4957

*I had to round the corners of this photo as my (unpolished) thumb could be seen, apologies!

My verdict: very drool-worthy and was so worth my impulse purchase on Shoppe Eclecticco’s website! I’ve been craving to own some Gloss ‘n Sparkle polishes for a long while, and I honestly can’t wait till my mum goes to Australia so she can bring me back more of the lovely indies there! Now I just have to make a list…

♥, xinyu

Time to meet the girlfriends! ~~

*Purchased By Me

Hi everyone! How is summer/June going? 🙂 I have started school 😦 but I will be officially ending in a few months so cant wait!

Anyways today I have a fun girly mani that would be great for a meet up with girlfriends! Without further ado, here it is..

Image

As you all know I love my pinks and purples so I wanted to play around with them to create a cute look!

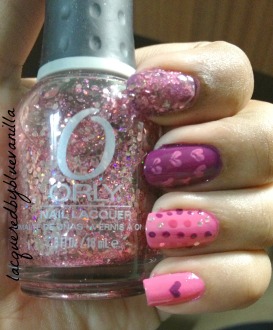
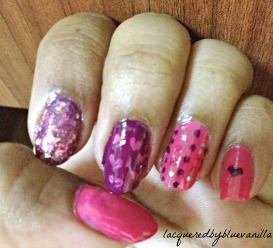
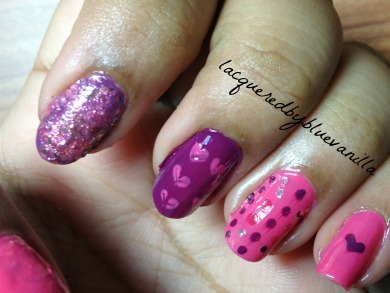
I painted my thumb, accent and little nails with OPI Feelin’ Hot-Hot-Hot. As for index finger, it got a coat of OPI Dutch ‘ya just love OPI? followed by two coats of ORLY Embrace. As for my middle finger, it has one coat of OPI Anti-Bleak.

Image

Now for the designs.. For my middle finger, I used OPI Feelin’ Hot-Hot-Hot to create the hearts. Its super easy; all you have to do is place two dots and then connect them together to form a heart! Its the same for the heart on my pinky, for which I used OPI Anti-Bleak. (I just switched the colors :P) For my accent nail, I dotted OPI Anti-Bleak and Rubi its getting hot in here and  finished off with two glitters from ORLY Embrace at the ends. Btw everything was done with my dotting tool!

Image

Thats about it! Super easy, fast and you get a cute & fun look! 😛 Do you guys have any ideas for a girly mani? Comment down below! 

xoxo, Bethanie